DIY Hanging Ferns for Your Front Porch: A Step-by-Step Guide for Budget-Friendly Charm
Table of Contents
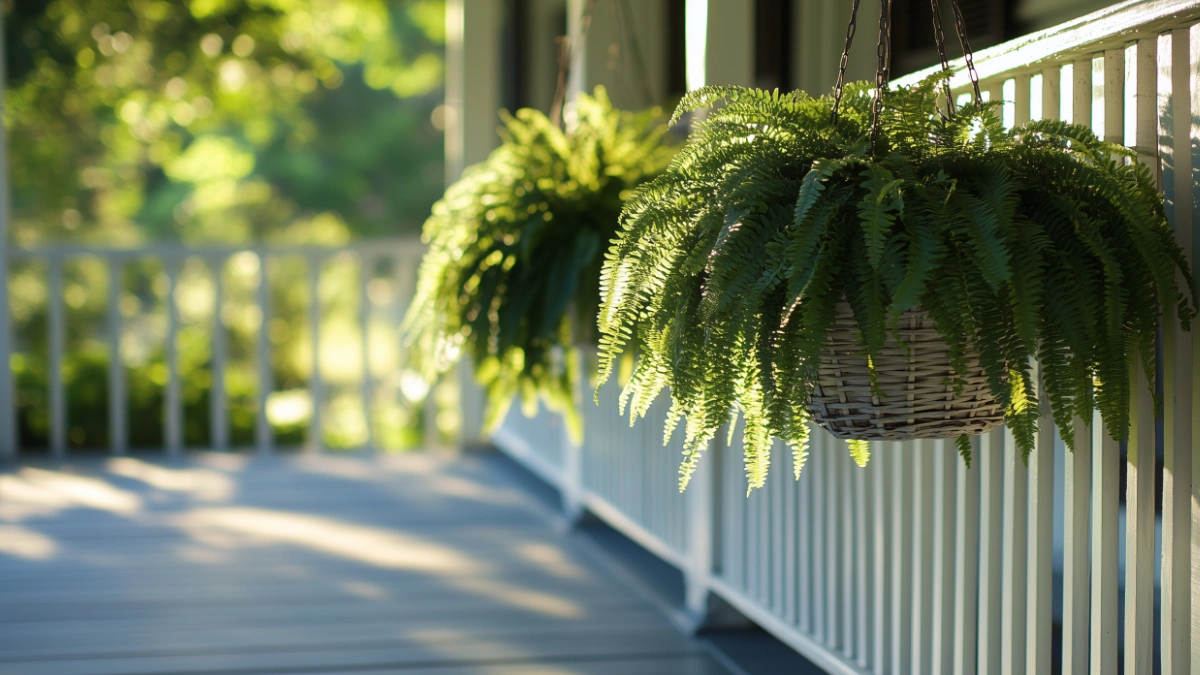
There’s something timeless about the soft sway of hanging ferns on a front porch. They bring an elegant, lived-in charm that instantly upgrades your home’s curb appeal—without requiring a full garden makeover. If you’ve ever admired the lush, cascading greenery on someone’s porch and thought, “I wish I could do that,” the good news is: you can. And you don’t need a professional landscaper or a hefty budget to get it done.
DIY hanging ferns are a practical and stylish way to frame your front entry, create shade, and add texture to your home’s facade. Whether you live in a suburban home with a wraparound porch or a city townhouse with a single stoop, ferns can thrive with the right conditions and care.
This guide will walk you through everything you need—from choosing the best ferns and planters to installation tips and maintenance tricks. You’ll learn how to hang ferns securely, keep them lush all season, and create a look that feels both polished and personal. Let’s turn your porch into the relaxing, Instagram-worthy retreat you deserve.
Choose the Best Ferns for Hanging Baskets

Not all ferns are created equal when it comes to hanging on your front porch. The ideal candidates are lush, cascading, and low-maintenance—perfect for busy homeowners or renters.
Boston ferns (Nephrolepis exaltata) are the most popular choice, known for their full, feathery fronds and ability to thrive in shaded outdoor spaces. Other excellent options include Kimberly Queen ferns (more upright and tidy) and Macho ferns (larger, dramatic fronds for deep porches).
Table – Best Ferns for Porch Hanging
| Fern Type | Appearance | Light Requirement | Growth Style |
|---|---|---|---|
| Boston Fern | Full, cascading fronds | Indirect shade | Spilling |
| Kimberly Queen Fern | Upright, clean shape | Partial sun/shade | Upright |
| Macho Fern | Bold, oversized fronds | Filtered light | Spreading |
Pick the Right Planters and Hanging Hardware
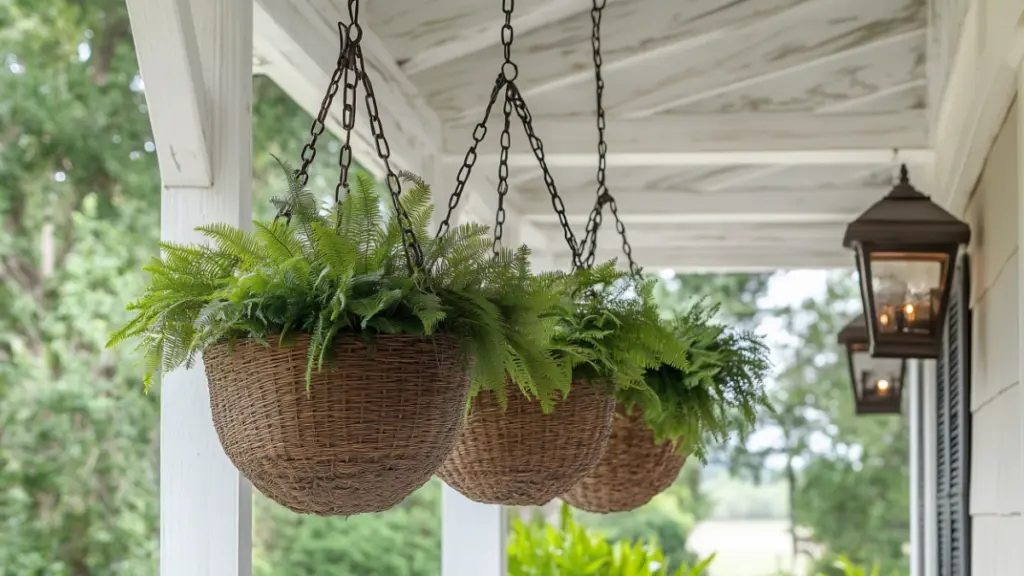
The planter you choose is just as important as the plant itself. Opt for a container that has excellent drainage and is deep enough to support root growth. Plastic or fiber-lined baskets are popular for their lightweight, breathable design. Coconut fiber liners, in particular, add a rustic touch while promoting good airflow.
Next, select strong and weather-resistant hanging hardware. Heavy-duty ceiling hooks or plant brackets secured to porch beams are best. Make sure the weight capacity supports a fully watered plant—wet soil can double the weight.
Table – Planter & Hook Selection Guide
| Item | Recommendation | Why It Works |
|---|---|---|
| Basket Material | Plastic, metal, coconut fiber-lined | Lightweight and breathable |
| Drainage Holes | Must-have | Prevents root rot |
| Ceiling Hook Type | Powder-coated or stainless steel | Rust-resistant and secure |
| Weight Limit | At least 20 lbs | Supports moist soil and large ferns |
Expanded Section: Step-by-Step Guide to Hanging Your Ferns
Now for the fun part—installing your ferns. This DIY project is approachable, even for beginners, and the results are instantly satisfying.
Step 1: Gather Your Materials
You’ll need your chosen ferns, hanging baskets, potting soil (preferably moisture-retaining), ceiling hooks or brackets, and a step ladder. Optional: slow-release fertilizer and drip trays.
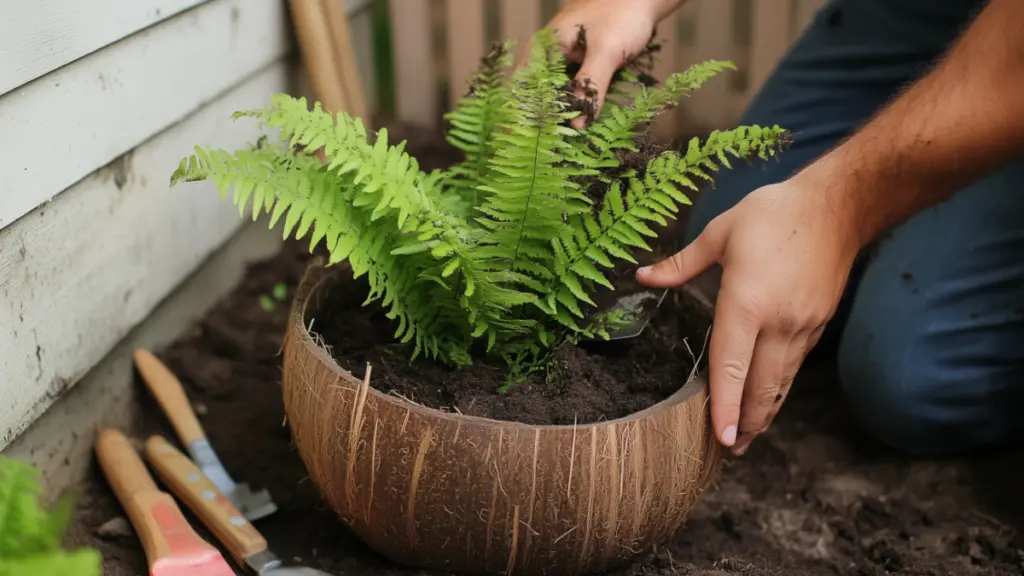
Step 2: Pot Your Ferns
Line your basket with the coconut liner (if applicable). Fill the base with soil, place your fern in the center, and backfill until it’s snug. Water thoroughly to settle the roots.
Step 3: Mark and Install Hooks
Use a tape measure to evenly space hooks along your porch ceiling or beam. Pre-drill holes and screw in heavy-duty hooks or install wall-mounted brackets.
Step 4: Hang and Adjust
Lift your potted fern and hook it in place. Ensure it’s hanging straight and adjust the chain length if needed. Repeat the process for additional baskets.
Table – DIY Hanging Checklist
| Task | Tool or Supply Needed |
|---|---|
| Prepping soil | Moisture-retaining potting mix |
| Hanging installation | Drill, hooks, level, step ladder |
| Final touches | Watering can, optional saucers |
| Maintenance setup | Hose reel nearby, light fertilizer |
Watering and Maintenance Tips for Thriving Ferns

Hanging ferns dry out faster than in-ground plants, especially in summer. To keep yours lush and healthy, check soil moisture daily—especially during heat waves.
Water when the top inch of soil feels dry, allowing water to drain freely. Consider taking the basket down and soaking it once a week to thoroughly hydrate the root ball. For consistent care, a drip irrigation hook-up or self-watering planter can help.
Mist your ferns occasionally to maintain humidity and trim brown fronds to encourage new growth.
Table – Weekly Fern Care Routine
| Day | Task | Notes |
|---|---|---|
| Monday | Water deeply | Check for even drainage |
| Wednesday | Mist and inspect leaves | Look for pests or dryness |
| Friday | Light fertilizing (bi-weekly) | Use diluted liquid fertilizer |
| Sunday | Rotate baskets (if needed) | Ensure even light and airflow |
Complement with Porch Decor for a Cohesive Look

Ferns are just the beginning. To make your front porch feel like a curated space, coordinate your hanging plants with other design elements. Choose matching planters or lanterns in similar finishes, and use rugs or outdoor pillows in leafy green tones to tie it all together.
A small bistro set, porch swing, or woven mat adds both function and style. This layering of textures and materials enhances the tranquil atmosphere and makes the space more inviting.
Table – Porch Styling Ideas with Ferns
| Item | Style Tip |
|---|---|
| Outdoor Rug | Neutral or green palette to match greenery |
| Throw Pillows | Botanical or fern-print covers |
| Wicker Planters | Add texture and natural feel |
| Hanging Lanterns | Soft evening ambiance |
Expanded Section: Seasonal Fern Care and Overwintering Tips
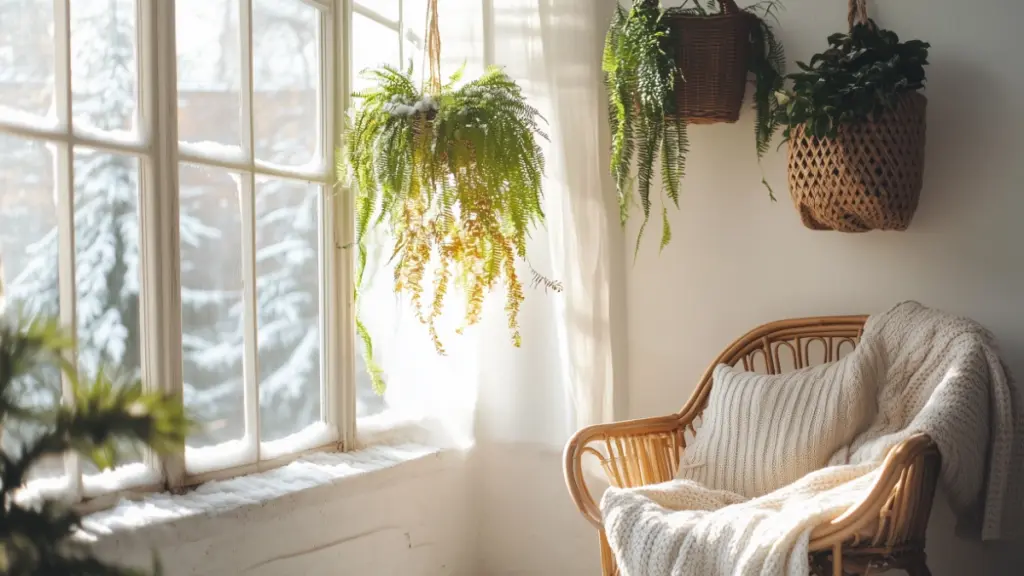
While ferns thrive in the summer warmth, cooler months call for a shift in care—or temporary relocation indoors.
If you live in a zone with freezing winters, ferns should be brought inside before the first frost. Place them in a bright, indirect light area like a sunroom or near a window. Water less frequently and avoid fertilizing until spring.
Alternatively, treat them as annuals and compost them in fall, replacing them next season. However, with proper care, many varieties will thrive year after year with seasonal relocation.
Table – Seasonal Fern Care Guide
| Season | Care Focus | Indoor Option |
|---|---|---|
| Spring | Fertilize and refresh soil | Move outdoors after last frost |
| Summer | Water often and maintain humidity | Keep shaded from intense midday sun |
| Fall | Trim dead fronds and reduce water | Bring indoors if frost is forecast |
| Winter | Minimal watering, no fertilizer | Use humidifier or mist occasionally |
Conclusion
Hanging ferns are a timeless way to add life and beauty to your front porch, whether you’re working with a modest balcony or a full wraparound veranda. With the right fern variety, durable planters, and thoughtful placement, this DIY project brings instant curb appeal and lush serenity to your home’s exterior.
By following these simple steps and caring for your ferns with consistency, you’ll enjoy a front porch that feels like a green oasis—welcoming guests, framing your home with elegance, and offering you a space to relax year-round.