Creating a Timeless Backsplash Kitchen on a Budget: Affordable Ideas for Classic Style
Table of Contents
A beautiful kitchen backsplash can be the perfect finishing touch that brings your whole design together. But when you’re on a budget, it’s easy to think timeless elegance is out of reach. Here’s the good news: creating a timeless backsplash kitchen doesn’t require a big budget—just smart choices, DIY know-how, and a little creativity.
The kitchen backsplash isn’t just a protective wall covering; it’s a style statement. Whether you love classic subway tiles or crave the charm of natural textures, the backsplash is your canvas for personal expression. According to a Houzz kitchen trends study, over 50% of homeowners upgrade their backsplash as part of a kitchen update—many of them seeking enduring styles over trendy ones.
In this post, we’ll walk through practical, cost-effective ideas for designing a timeless backsplash kitchen. You’ll explore classic materials, DIY installation tips, and budget-conscious shopping strategies to transform your kitchen into a space that never goes out of style. Whether you’re renting, renovating, or refreshing your space, this guide has everything you need to create a look you’ll love for years to come.
Choose Classic Materials That Never Go Out of Style
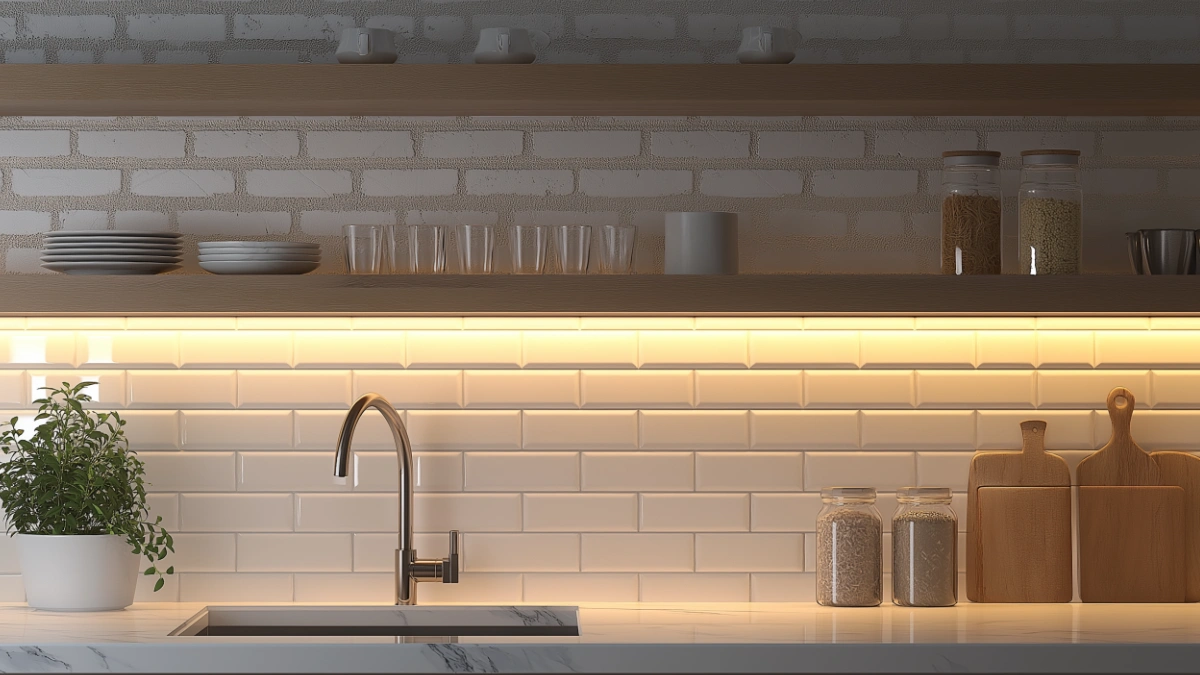
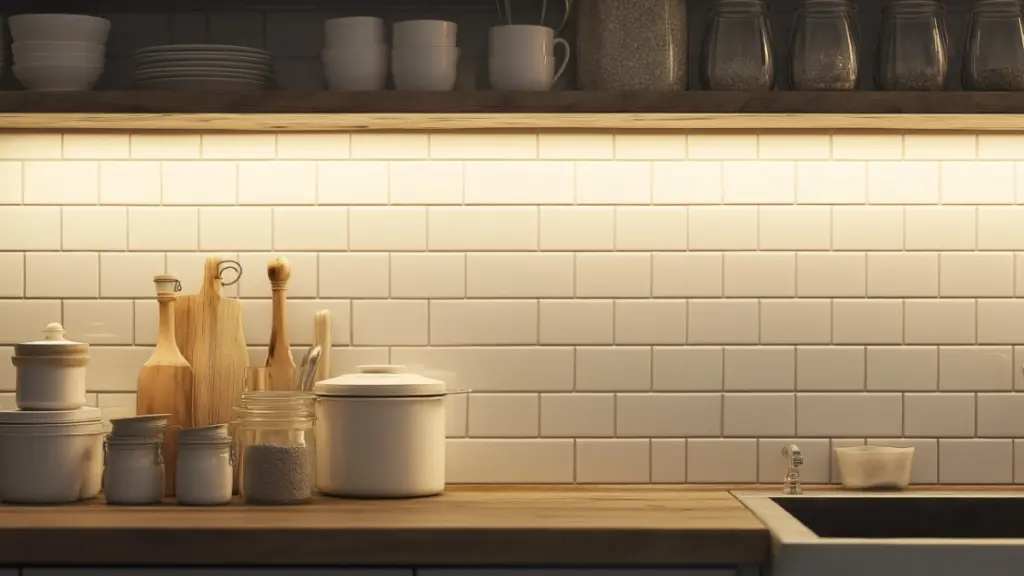
When aiming for a timeless backsplash kitchen, material choice is key. Certain materials like subway tile, marble, and white ceramic remain classic because they offer clean lines and universal appeal.
Subway tiles are incredibly budget-friendly and can be found in a wide range of colors and finishes. Opt for white or cream for a clean look, or go for matte finishes for a modern twist. Marble—whether real or faux—adds instant sophistication. For budget versions, peel-and-stick marble-look tiles offer the aesthetic without the cost.
Natural stone and classic ceramic tiles are also safe bets for timeless appeal. Stick with neutral colors, and avoid overly trendy patterns or novelty shapes if you want a look that lasts.
Timeless Backsplash Materials Comparison
| Material | Timeless Appeal | Budget Range | Easy to DIY? |
|---|---|---|---|
| Subway Tile | High | Low–Mid | Yes |
| Faux Marble Tile | Moderate to High | Low | Yes (peel-and-stick) |
| Natural Stone | High | Mid–High | Moderate |
| Classic Ceramic | High | Low–Mid | Yes |
Consider Peel-and-Stick Options for Budget-Friendly Impact

If you’re renting or simply want a no-fuss installation, peel-and-stick backsplash tiles can be your best friend. These adhesive-backed tiles mimic the look of ceramic, stone, or even glass, and can be installed in an afternoon.
Modern peel-and-stick designs come in styles that rival traditional tiles—hexagon patterns, faux marble, or matte subway tile layouts. The bonus? No grout, no tools, and no contractors required.
Just ensure the surface is clean, dry, and smooth before application. While not as durable as real tile, they’re ideal for light-use kitchens or as a temporary design upgrade.
Peel-and-Stick Tile Pros and Cons
| Pros | Cons |
|---|---|
| Easy to install and remove | Less durable than real tile |
| Inexpensive and renter-friendly | Not heat-resistant |
| Wide variety of styles | Can peel over time if misapplied |
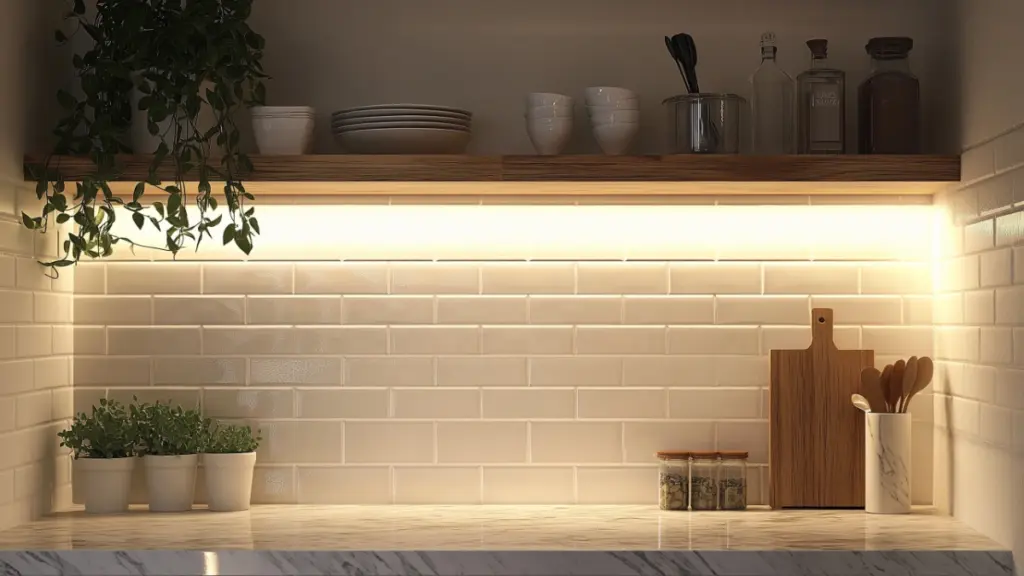
Stick to Neutral Tones for Lasting Appeal
Color trends may come and go, but a neutral palette stands the test of time. Whites, creams, soft grays, and warm taupes are perfect for a timeless backsplash kitchen because they work with any cabinetry or countertop style.
If you love color, you don’t have to shy away completely—consider muted greens, soft blues, or blush tones that offer personality without overwhelming. Keep in mind that the backsplash is a backdrop, not the main attraction.
Using a single color tile from countertop to cabinet makes a kitchen feel taller and more cohesive, especially in small spaces.
Neutral vs. Bold Backsplash Colors
| Color Type | Pros | Best Use Cases |
|---|---|---|
| Neutral (white, gray, beige) | Timeless, flexible, brightening | All kitchen styles |
| Muted Color (sage, blush) | Adds warmth without trend risk | Cozy, personal spaces |
| Bold Color (navy, black) | Statement-making | Use as accent or feature wall |
DIY Your Installation to Save on Labor Costs
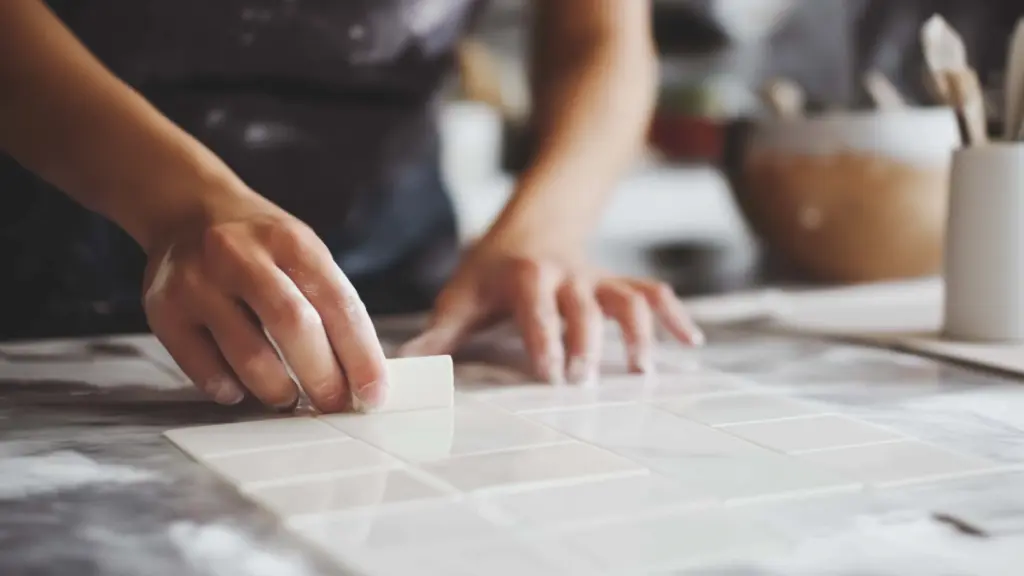
Installing a backsplash yourself can dramatically reduce the overall cost of your kitchen project. Basic tiling requires tools like a tile cutter, adhesive, grout, and spacers—but many kits now come ready for beginners.
Start small: a single wall or a stove splash zone can be a great beginner project. Look up tile installation tutorials, and take your time measuring and spacing for a polished result.
Even if you don’t tile the entire wall, a strip of tile just above the counter can make a big design impact on a budget.
DIY Tiling Steps Table
| Step | Tools Needed | Time Estimate |
|---|---|---|
| Surface Prep | Cleaner, sanding block | 30 mins |
| Layout & Dry Fit | Tile spacers, pencil | 1–2 hours |
| Adhesive & Tile Set | Trowel, adhesive | 2–4 hours |
| Grouting & Sealing | Grout, sponge, sealer | 2–3 hours |
Use Grout Color to Define or Blend the Look
Grout color may seem like a small detail, but it can totally change the vibe of your kitchen backsplash. White grout gives a clean, seamless look, while dark grout creates contrast and highlights the tile pattern.
If you’re working with classic subway tiles, pairing them with gray or charcoal grout adds depth and modern edge. For a completely cohesive look, match grout to tile for a monochrome, polished effect.
Just be aware that white grout, while timeless, can stain easily—so opt for sealed or stain-resistant grout if maintenance is a concern.
Grout Color Guide
| Grout Color | Effect | Best With |
|---|---|---|
| White | Bright, clean, traditional | White or cream subway tiles |
| Gray | Soft contrast, easy upkeep | Neutral tiles, modern kitchens |
| Charcoal | High contrast, bold lines | Geometric or patterned tiles |
| Matching | Seamless, minimal look | Monochromatic designs |
Repurpose Unconventional Materials Creatively
When on a strict budget, look beyond traditional tile. Beadboard, shiplap, chalkboard paint, or even stainless steel panels can work as unique backsplash alternatives that offer charm and character.
Using reclaimed wood or tin ceiling tiles is another way to achieve a farmhouse or rustic aesthetic. These can be sealed to protect against moisture and grease, and offer a one-of-a-kind look.
Keep creativity at the core of your project—your backsplash doesn’t need to look like everyone else’s to feel timeless.
Creative Material Ideas
| Material | Aesthetic Style | Budget Level |
|---|---|---|
| Beadboard | Cottage, coastal | Very Low |
| Tin Ceiling Tiles | Vintage, industrial | Low–Mid |
| Chalkboard Paint | Modern, fun | Low |
| Reclaimed Wood | Rustic, eclectic | Free–Low (DIY) |
Expanded Section: DIY Your Installation to Save on Labor Costs
One of the biggest ways to cut costs in a kitchen backsplash project is by doing the installation yourself. While the thought of cutting and placing tile might sound intimidating, many homeowners are surprised at how approachable the process is with the right tools and a little patience.
Start by choosing tiles that are beginner-friendly, such as mesh-backed mosaics or subway tiles that require minimal cuts. Watch a few tutorials from trusted home improvement sites or creators before beginning. Map out your tile layout with spacers before applying adhesive—this prevents uneven lines and awkward gaps.
It’s important to prep your wall surface thoroughly. Clean it well and lightly sand it if glossy or painted, so that the adhesive sticks properly. When tiling, use a level to make sure your first row is straight—this is crucial because all the following rows will depend on it.
If full tiling still feels too advanced, consider tiling just one section (like behind the stove) for a simple but effective upgrade. Many peel-and-stick options also come with grid backings, making alignment easier for first-timers.
Expanded Section: Choose Classic Materials That Never Go Out of Style
Material selection is foundational when designing a timeless backsplash kitchen. Subway tile has been around for over a century and continues to be a go-to for budget-conscious renovators due to its price, versatility, and enduring popularity. Whether stacked horizontally, vertically, or in a herringbone pattern, subway tile adapts easily to most kitchen styles.
Another affordable yet sophisticated choice is faux marble. With peel-and-stick options mimicking the natural veining of marble, you can achieve a luxurious look without committing to high costs or maintenance. Faux finishes are ideal for renters or DIY beginners because they’re easy to remove and replace when tastes change.
If you want something more earthy, classic ceramic tiles in a 4×4 square can offer a vintage touch while staying budget-friendly. Available at nearly every home improvement store, these tiles can be arranged in patterns or painted with stencils for a custom look.
By sticking with tried-and-true materials, you’ll ensure that your backsplash remains appealing and adaptable—even as the rest of your kitchen evolves.
Conclusion
A timeless backsplash kitchen doesn’t need to break the bank. With classic materials, strategic color choices, and a willingness to get a little hands-on, you can transform your space into a kitchen that blends beauty with longevity. The key lies in balancing form and function—choosing options that look good today and will still feel fresh ten years from now.
Whether you go the peel-and-stick route or tackle a full tile install, there’s a solution here that fits your budget and style. When in doubt, choose simplicity, stick with neutrals, and lean into creativity. After all, timeless design isn’t about following trends—it’s about creating a space that feels just right, year after year.